Getting Started
Welcome to the Ntracts User Guide. The instructions below describe the process for signing into your Ntracts account and give a brief tour of the application. You can use the navigation menus above as well as search within the documentation by typing in a term and clicking Search above the menu bar.
Username Request and First Time Sign In
When you sign in to Ntracts, you go the account-specific website address that was provided to you. If you do not know your website address, contact your internal system administrator.
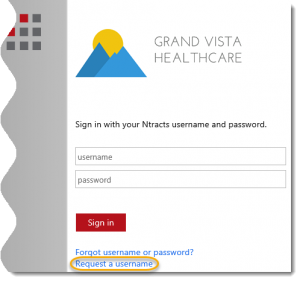
Click on the link provided or type the website address into a supported browser. Ntracts appears with a prompt for your username and password.
Note: Clients using single sign on will not follow these steps. Instead click on your health system’s realm to be connected to your network sign-in page. Use your network username and password to sign into Ntracts. For questions please contact your internal system administrator.
To request a username, follow the steps below:
1. Click Request a username.
2. Enter your desired Username and Password.
 |
The New Username request form will perform a validation on the username and email address fields before the form can be submitted. Hover over the question marks for more assistance.
Usernames will be validated based on the length of the value. A message will be displayed if the number of characters exceeds the maximum limit. Passwords will expire every 180 days. When changing or resetting a password, you may not reuse a previous password until 24 unique passwords have been used. |
-
-
- A password must meet the following requirements:
-
-
- Be at least seven characters long
- Contain characters from the following:
-
- English uppercase characters (A – Z)
- Numerical digits (0 – 9)
- Special character (for example, !, $, #, %)
-
-
-
-
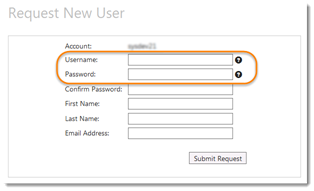
3. Enter your password again in the Confirm Password field.
4. Enter your contact information.
 |
Email address: The validation is performed on the format of the value. A message will be displayed if entry does not meet the format requirement. |
5. Click Submit Request.
The following dialog box will be displayed:
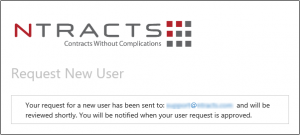
Once submitted, the designated approver will receive the request and will need to approve request before you can use Ntracts. You will receive an email notifying you of your approval or denial.
Menu Navigation Bar
When you sign in, you see the home screen. This menu navigation bar appears across the top of the screen. Here is an overview of each item:

Setting up your Nbox
1. After signing into Ntracts, click Nbox on the menu bar.
![]()
2. The Add an Nbox Tab window appears. The Email Address has been auto-populated. Type your name in the Name field as you wish it to appear on the tab.
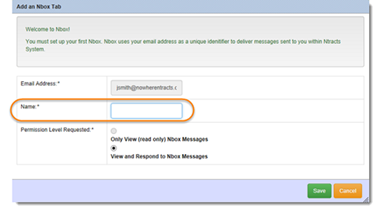
The Permission Level Requested is preselected to View and Respond to Nbox Messages.
3. Click Save.
4. Click Nbox on the menu bar.
![]()
5. Click the Refresh List button.

Your Nbox is now set up. Any messages already delivered will be displayed.
Information Icons
| An Nbox Action is a request for you to perform a task. | |
| An Nbox Notification is an automated message that provides an important piece of information related to a workflow and does not require a response from the user. | |
| In a site search, this represents a contract record. | |
| In a site search, this represents an individual address book entry. | |
| In a site search, this represents an organization address book entry. |
Action Icons
|
Read Only View of Contract Record |
Click on the padlock to open a read only view of the contract record. You can read the contract record but do not have the ability to edit it. | |
|
Documents Attached to Contract Record |
Hover over the paperclip to see how many documents are attached to the contract record. Access to the actual documents may or may not be included on the Documents tab in the contract record or summary view. | |
|
Read Write View of the Contract Record |
Click on the pencil to open a read write view of the contract record. You can edit the contract record. | |
|
Summary View of the Contract Record |
Click on the magnifying glass for a summary view of the contract record. Summary view includes the contract record information, related contracts, primary parties, responsible parties, and documents. There is no editing capability when using the summary view. | |
|
Trash can |
Click to remove or delete information. | |
|
Unmarked Favorite |
Click to designate the contract record as a favorite. | |
|
Contract Record marked as a Favorite |
This appears when the contract record is designated as a favorite. | |
|
New Item |
Click to create an item, for example a new contract record, datasheet, or Address Book entry. | |
|
Delete |
Click to remove information. | |
|
Date Picker |
Click to make a calendar appear to help you complete a date field. |
Site Search
You can use the Search field on the toolbar to search for:
-
-
-
-
-
-
- Contract Records
- Address Book Entries
-
-
-
-
-
Enter information you have about an individual, organization, or contract, such as partial last name or an organization name, into the search field.
To complete a site search, follow the steps below:
1. Enter the first few characters of your search term or phrase in the Search field.
![]()
2. Once your search term or phrase is recognized, a window will appear below the Search field with any results.
If there are no matches to your search term or phrase, you will see “No Results” in red next to the Search field.
![]()
To delete your search term or phrase and start over, click on the X in the Search field.
![]()
Accessing the Support Center for the First Time
From the Help menu you can access the Support Center. The Support Center is a self-service portal where you can submit a support ticket and track the progress of it, as well as access a library of resources to help you with Ntracts. FAQs, release notes, quick reference guides, and tutorial videos are available. You will need to create a Support Center account the first time you access it. Follow these steps to create an account.
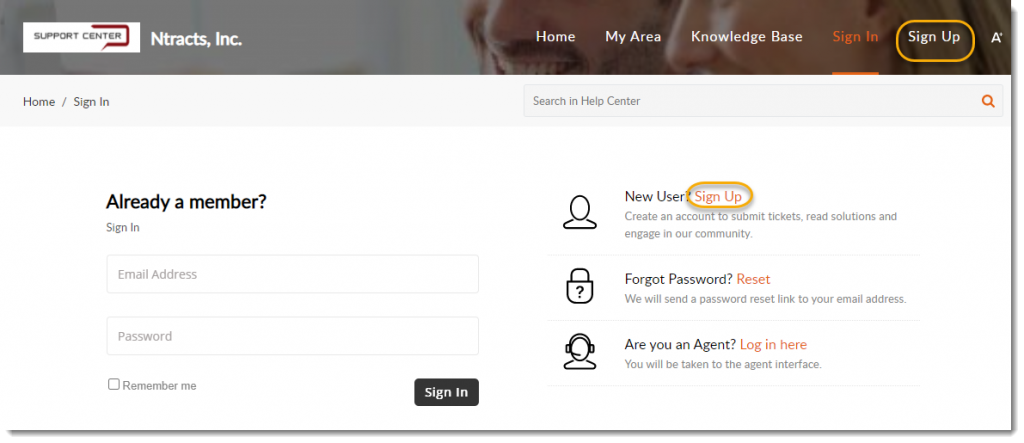
1. From the Help menu, select Support Center.

2. From the Support Center Sign in screen, click Sign Up.
3. Enter your name, email address, and complete the word verification.
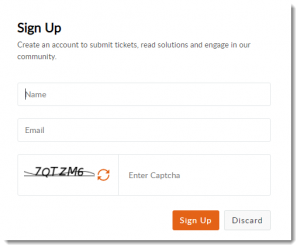
4. Click Sign Up. A message appears notifying you an email has been sent with further instructions on how to sign in.

5. In the email, click on the link to accept the invitation.

6. From the Confirm Password page, enter and then confirm your desired password.
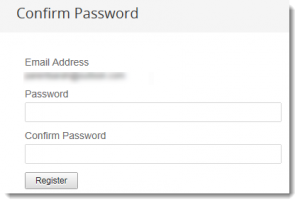
7. Click Register. You will then be signed into the Support Center.
 |
For future visits to the Support Center, you can sign in using the email address and password assigned during this sign up process.In the event you forget your password, click Reset to receive an email with a link to reset your password.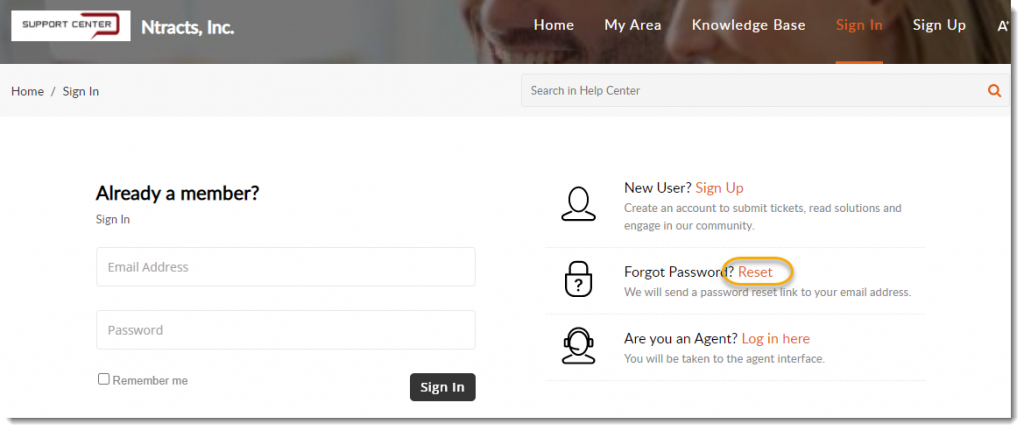 |