At A Glance
With appropriate permissions, you run, create and/or edit reports from the Reports menu. Should you need additional support, there is a question mark button located in the upper right hand corner of the screen that opens a help menu.
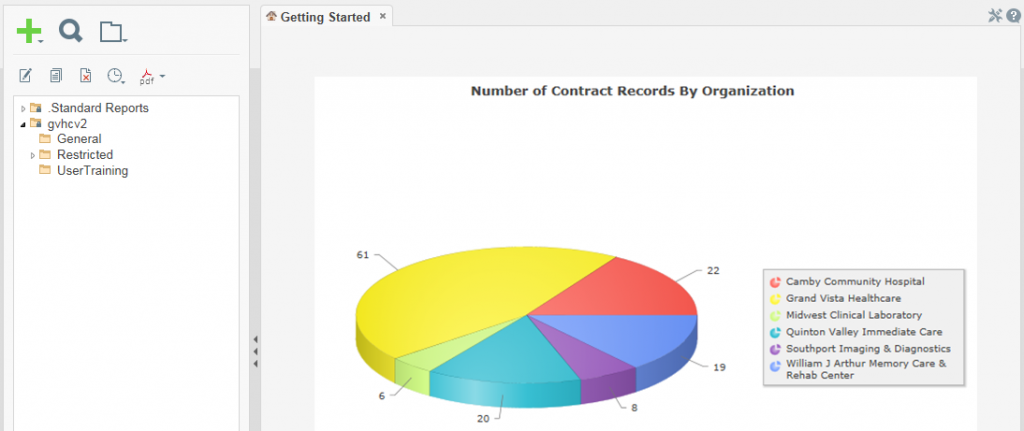
On the left is the main menu which displays your report folder and reporting tool bars. If you hover over the icons, a small box will appear letting you know the function of it. On the right is a tabbed section. Tabs can also be rearranged by clicking and dragging them as desired.
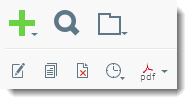
Menu Tools
Report Folders
Padlocks may appear on the file icon. This does not mean your access is restricted, rather it means you cannot edit or change the folder or report.
Double-click on the folder to open its subfolders. You can expand all the way down to the point that the triangle is black.
The Standard Reports folder contains the reports that are part of every Ntracts account. If your user account has the correct permissions, you can run the reports. If you cannot run reports but think you should be able to, contact your system administrator.
Depending on permissions assigned, users may be able to create new reports or copy standard reports and customize them. The new or customized reports reside in the <your account> folder. This folder may display up to three sub-folders:
- General – reports in this folder can be run by anyone with permission to run reports
- Restricted – reports in this folder require a higher level of permissions to run
- <your username> – those with appropriate permissions can create, save, and share new reports in this folder
Some reports allow you to add additional filters and some have already been added.
Output Files Formats:
HTML– opens within the webpage
XLS– opens in Excel with formatting
PDF– opens with Adobe Reader
RTF– rich text format will open in something like Word
CSV– opens in Excel with no formatting
Running a Report
To run a standard report:
1. Click Reports from the menu.
![]()
2. From the navigation pane on the left, click the triangle node to the left of the Standard Reports folder to expand. Alternatively, double click on the folder name.
3. Click on the desired report name.
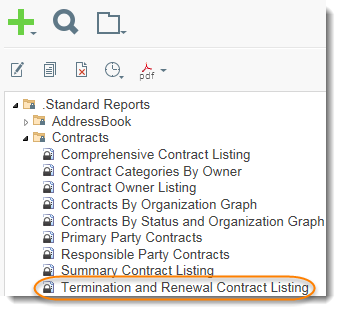
4. Select the output format by clicking on the dropdown arrow next to the HTML button. Alternatively, right click on the report. Select Execute As and select your output file type.
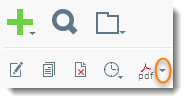
If a new tab opens prompting you to select filter fields, continue to Step 5. If not, skip to Step 11.
5. In the Select the field to include on report dropdown, select the category that contains the desired field. For example, Contract Record Details will contain the fields found on that tab in the contract record.

6. From the list on the left, click on your desired field and click Add. Alternatively, you can select the field and drag it into the Filter By pane.

7. Once it appears to the right, you can choose your operator from the dropdown menu.
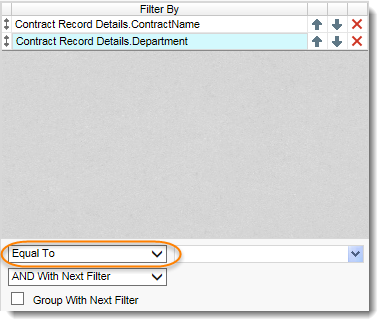
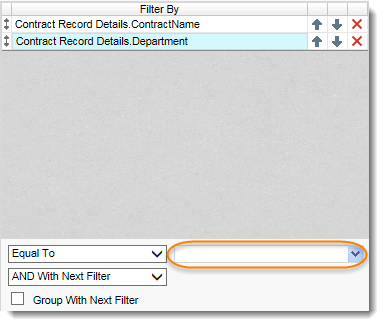
8. Enter your search term either by typing it in or using the dropdown menu.
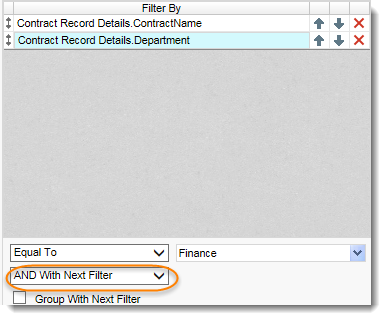
9. From the dropdown menu, decide if you want it to be an AND or OR search with the next filter listed.
NOTE: AND will require both to be true. OR will require that either can be true.
10. Repeat steps 5-9 until all filters have been added.
The Summary field below summarizes your filter choices made above.
NOTE: If you’d like to change the order in which the filter is applied, you can move each up or down by clicking on the appropriate arrow. You can delete a row by clicking on the orange X.
11. Click OK and you see a message letting you know the report is initializing.
12. If HTML or PDF output formats were selected, the report will open in a tab. If XLS, RTF, or CSV were selected as the output format you will be prompted by your browser. Choose Open. The report will open. (May vary depending on your browser.)
Creating a Report
For directions on how to create a new report, click on the question mark located in the upper right hand corner of the screen. The help menu will open.
NOTE: The Categories tab in the New Standard Report Wizard has a different meaning than the contract categories used in Ntracts. In the Reports menu, the Categories tab allows you to select the data categories you would like to have access to on the report.
Contract categories used in Ntracts identifies the type of contract described in the contract record. It provides a way to group contracts substantively or by subject matter. Contract categories are also linked to Custom Tabs.
Scheduler Menu
With appropriate permissions assigned, the Schedule Report Menu provides tools to immediately email a report or schedule email delivery of a report on a recurring basis. Reports can be sent to recipients who do not have access to Ntracts as well as Ntracts users that do not have access to reports. Once generated, the report is attached to an email in the specified format which can be viewed, printed or saved by the recipient. This timesaver will reduce task load allowing for more efficiency. The scheduler Menu options include scheduling a report, emailing a report, or managing scheduled reports.
To schedule a report:
1. Click Reports from the menu.
![]()
2. From the navigation pane on the left, click the triangle node to the left of desired report folder to expand. Alternatively, double click on the folder name.
3. Select the desired report.
4. Click on the Scheduler Menu ![]() .
.
5. Click on the first clock down with the + sign ![]() . A wizard will open in a tab on the right side called Schedule Report.
. A wizard will open in a tab on the right side called Schedule Report.
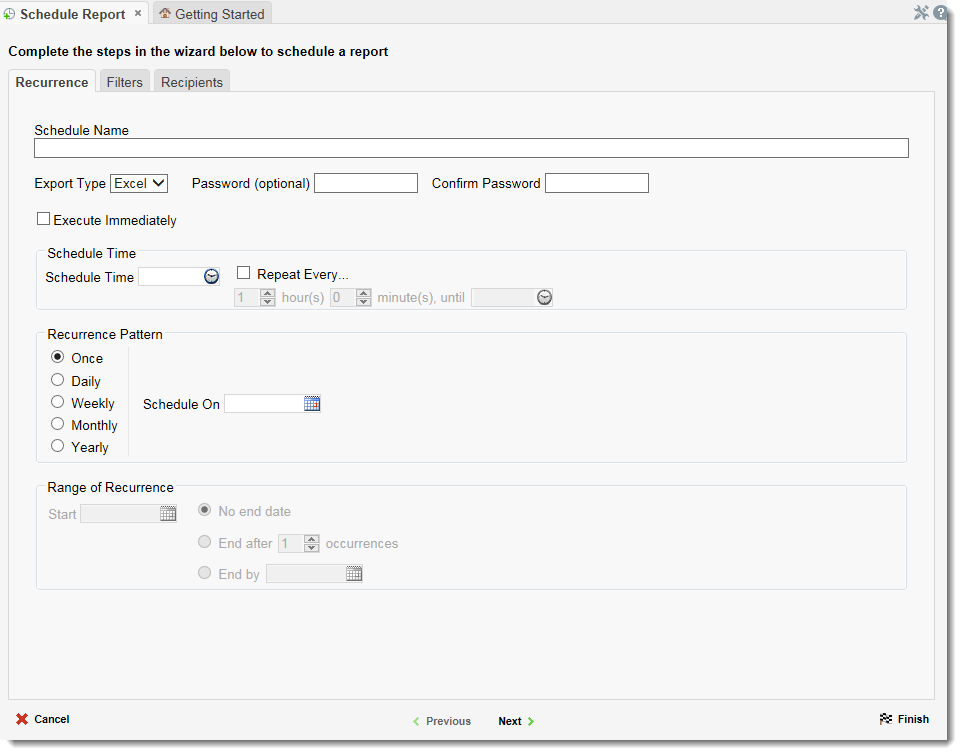
6. Complete the steps in the wizard. There are three tabs-Recurrence, Filters, and Recipients. After completing a tab, click Next to advance to the next tab.
Recurrence tab– Enter the parameters including the schedule name, export type, and time periods.
Filters tab– Select filter fields to be included on the report.
Recipients tab– Enter the email address(es) of the recipient(s) that will receive the report. NOTE: When entering multiple email addresses, use a comma and a space in between each.
7. Click Finish.
8. A message will appear confirming your report has been scheduled. Click OK.
To email a report immediately:
1. Click Reports from the menu.
![]()
2. From the navigation pane on the left, click the triangle node to expand the folder. Alternatively, double click on the folder name.
3. Select the desired report.
4. Click on the scheduler menu ![]() .
.
5. Click on the second clock down with the envelope ![]() . A window appears next to it.
. A window appears next to it.
6. In the text field, enter the desired email address. NOTE: Only one email address can be entered through this method.
![]()
7. From the dropdown arrow, select the report output format to email the selected report immediately.
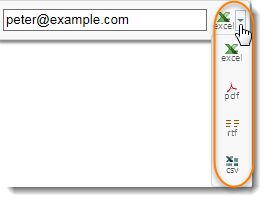
If the report allows for additional filters, the Report Filters window will be displayed. Select the desired filters and click OK. See Running a Report for additional information on report filters.
8. A message confirming that the report will be emailed appears. Click OK.
To manage scheduled reports:
1. Click Reports from the menu.
![]()
2. From the navigation pane on the left, click on the scheduler menu ![]() .
.
3. Click on the third clock down with the pencil ![]() . A new tab opens to the right called Scheduled Reports.
. A new tab opens to the right called Scheduled Reports.
4. Depending on the status of the scheduled report, you can edit or delete a specific row. To edit, click on the paper and pencil icon on the desired row and the Schedule Report Wizard will open allowing for modification of the report. To delete a scheduled report, click the orange X on the desired row.

NOTE: Clicking Refresh updates the status and lists any new schedules. Clicking Flush removes all completed schedules that will not run again.